The easiest way
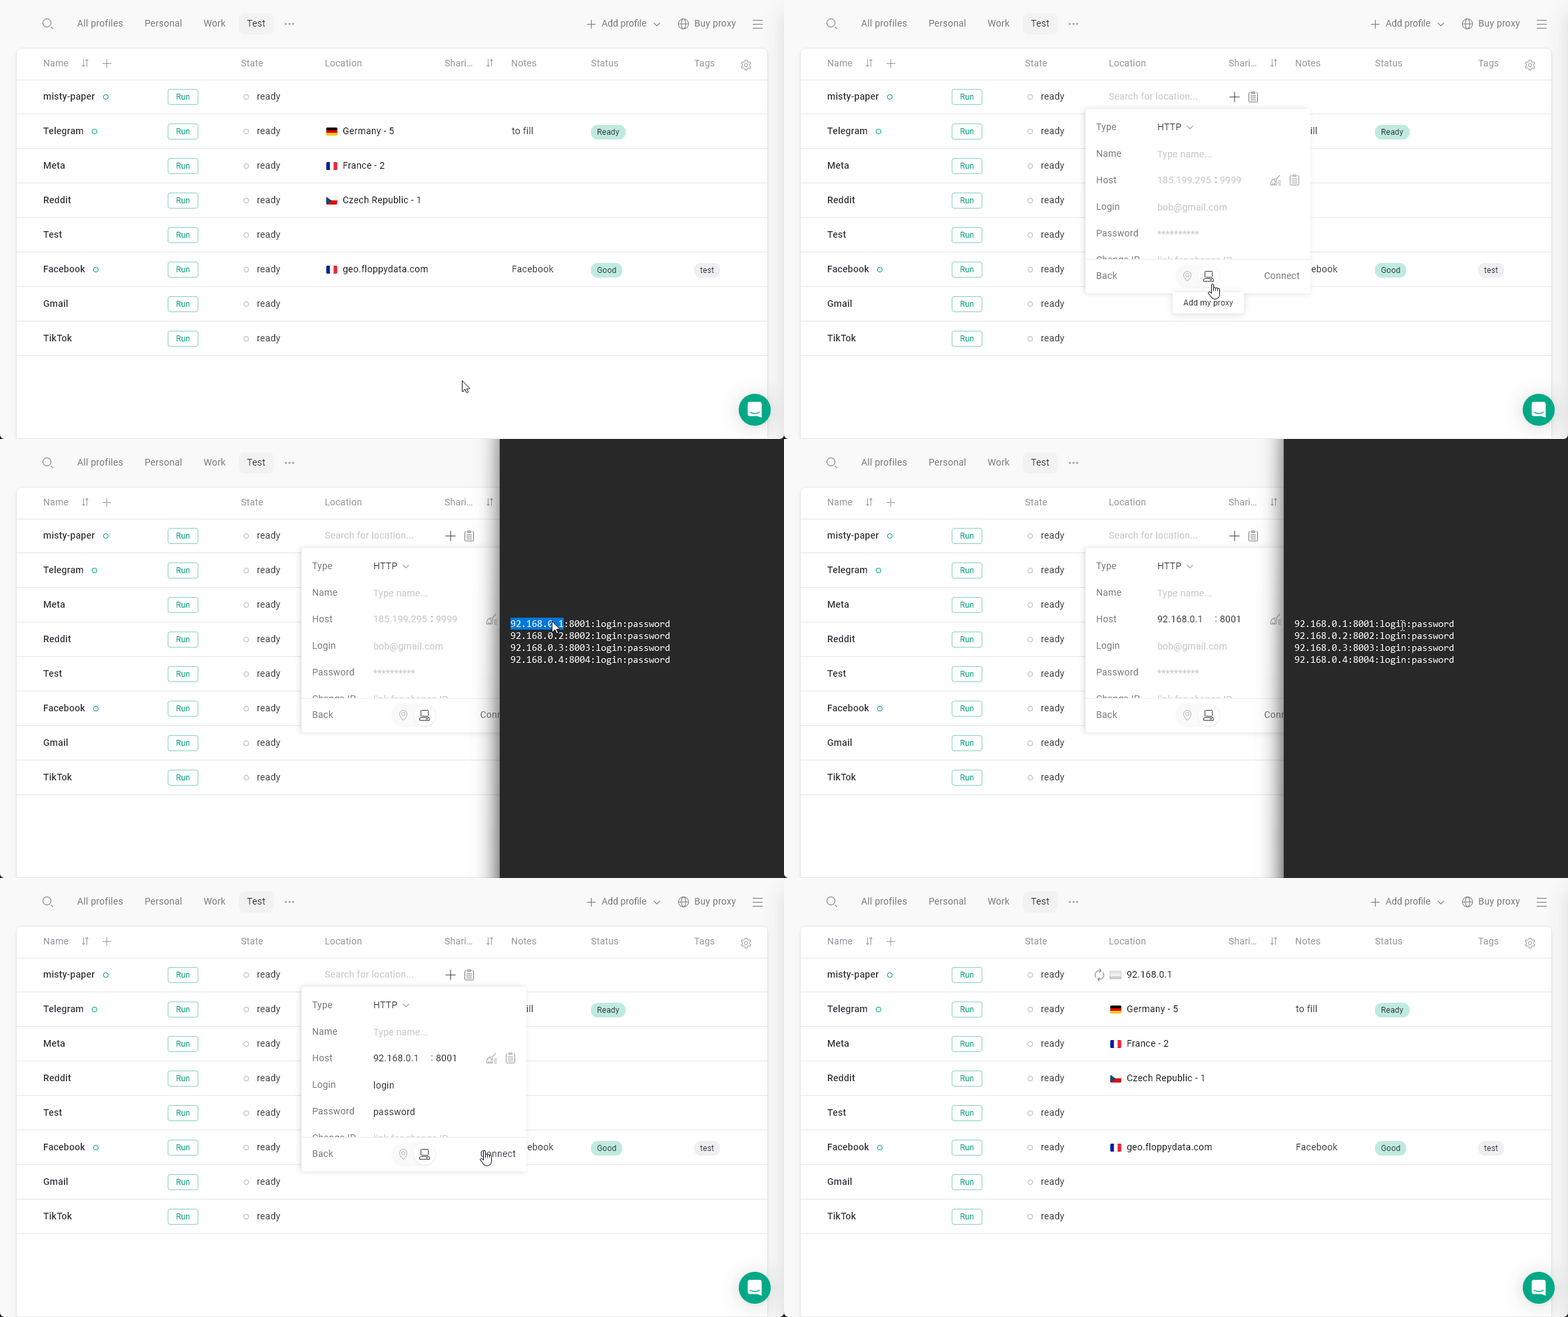
- At the All profiles page, find the Location column and click the + button at the profile, which you want to add a proxy to.
- In the opened window, choose the computer icon and input your IP, port, username and password. The HTTP or SOCKS protocol will get selected automatically based on availability, you can change it later.
- Click Connect, the proxy is now added to your profile!
- Gologin will check your proxy right away. You will see the green indicator if the proxy works properly, or the red one if it is not.


Other ways of adding a single or multiple proxies
On the Proxies page
Via the main menu at the top-right > Proxies > Import proxies
Using mass profile selection
Select a few browser profiles> click Proxy on top > input proxies in a new window > click Update proxy
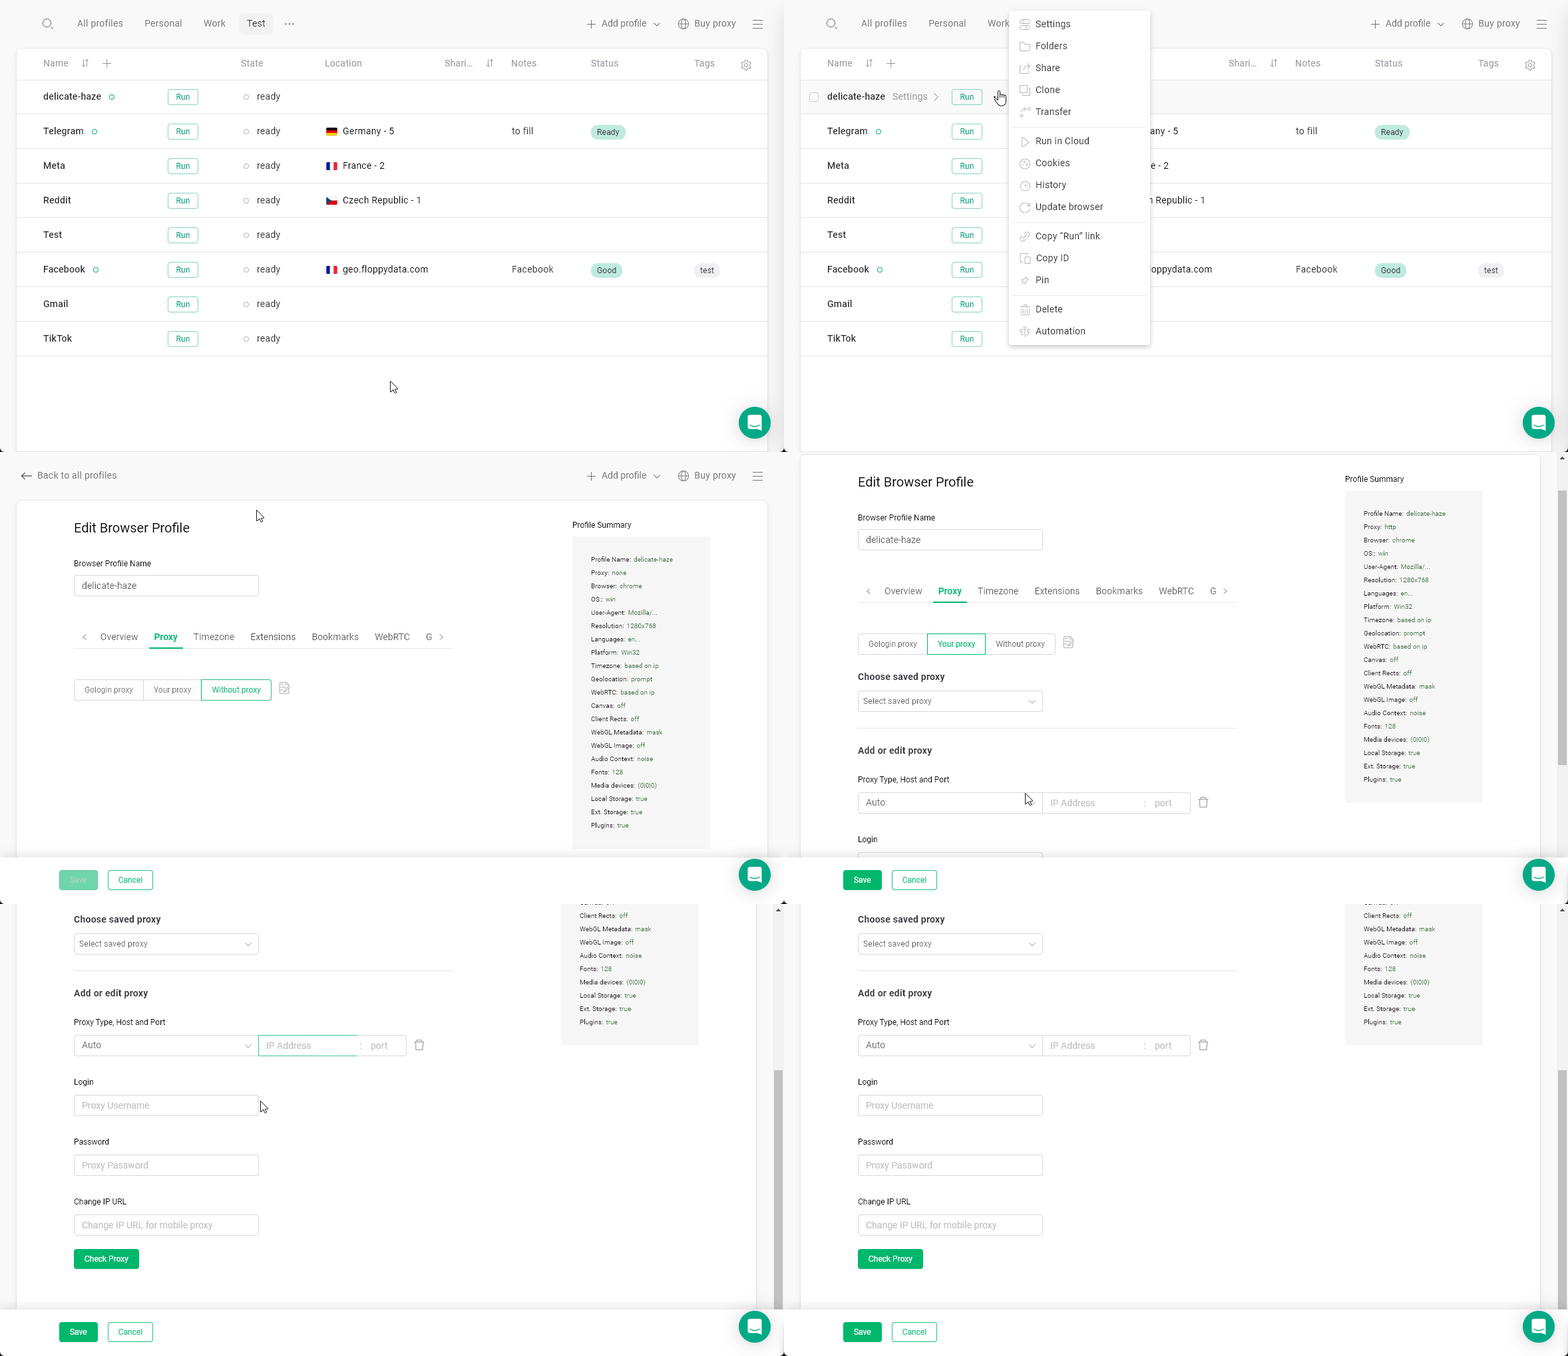
In the profile settings
Click 3 dots on the profile > Settings > Proxy > Your proxy