> ## Documentation Index
> Fetch the complete documentation index at: https://gologin.com/docs/llms.txt
> Use this file to discover all available pages before exploring further.
# Proxies Page
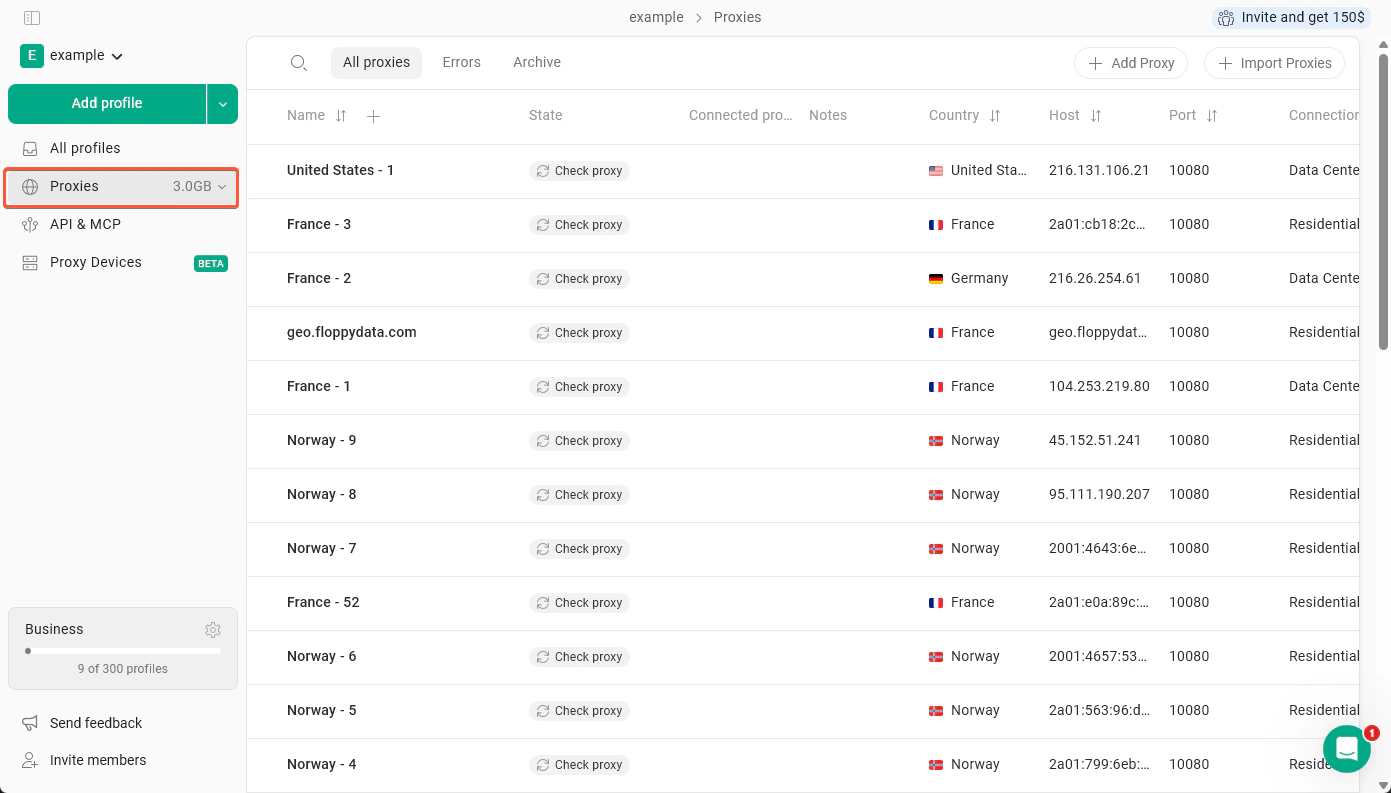
Gologin lets you manage proxies in two ways: directly on the All profiles page, or from a dedicated **Proxies page**. The Proxies page is useful when you work with a large number of proxies and want to organize them independently from profiles.
To open it, click **Proxies** in the left sidebar.
 ## Navigation
### The proxy list
Your proxies are displayed as a table with the following columns:
* **Name** — the label you've assigned to the proxy
* **State** — current status; use the **Check proxy** button to test it
* **Connected profiles** — shows which profiles this proxy is attached to
* **Notes** — any custom notes you've added
* **Country** — detected location of the proxy
* **Connection type** — it will display the proxy type for Gologin proxies, such as Residential and Data center, or the connection type for third-party proxies, such as HTTP or SOCKS
* you also have access to change **Host**, **port**, **login** and **password** proxy fields
### Tabs
At the top of the page you'll find three tabs:
* **All proxies** — your full proxy list
* **Errors** — proxies that failed a check
* [**Archive**](/proxy/proxy-management/proxy-manager/proxy-archive) — proxies you've deleted or haven't used for a long time
### Adding proxies
You can add proxies two ways using the buttons in the top-right corner:
* **Add Proxy** — add a single proxy manually
* **Import Proxies** — add multiple proxies at once
## Navigation
### The proxy list
Your proxies are displayed as a table with the following columns:
* **Name** — the label you've assigned to the proxy
* **State** — current status; use the **Check proxy** button to test it
* **Connected profiles** — shows which profiles this proxy is attached to
* **Notes** — any custom notes you've added
* **Country** — detected location of the proxy
* **Connection type** — it will display the proxy type for Gologin proxies, such as Residential and Data center, or the connection type for third-party proxies, such as HTTP or SOCKS
* you also have access to change **Host**, **port**, **login** and **password** proxy fields
### Tabs
At the top of the page you'll find three tabs:
* **All proxies** — your full proxy list
* **Errors** — proxies that failed a check
* [**Archive**](/proxy/proxy-management/proxy-manager/proxy-archive) — proxies you've deleted or haven't used for a long time
### Adding proxies
You can add proxies two ways using the buttons in the top-right corner:
* **Add Proxy** — add a single proxy manually
* **Import Proxies** — add multiple proxies at once