> ## Documentation Index
> Fetch the complete documentation index at: https://gologin.com/docs/llms.txt
> Use this file to discover all available pages before exploring further.
# Adding and managing proxies
There are several ways to connect your proxies in the Gologin browser. We will cover all of them in this article, from the most obvious to more sophisticated.
Third-party proxy providers usually give **IP, port, username and a password** as an endpoint for your connection. You can paste those credentials almost anywhere throughout various proxy settings and a new proxy will get added to your proxy list.
We support the following proxy pasting formats:
```text theme={null}
192.168.0.1:8000:login:password
http://192.168.0.1:8000:login:password:name
socks5://login:password@192.168.0.1:8000:name
socks5://login:password@192.168.0.1:8000[https://change-my-ip.com]:name
http://192.168.0.1:8000:login
http://192.168.0.1:8000:myproxy:pass[https://change-my-ip.com]
http://192.168.0.1:8000:myproxy:pass[https://change-my-ip.com]:name4
```
## The simplest way
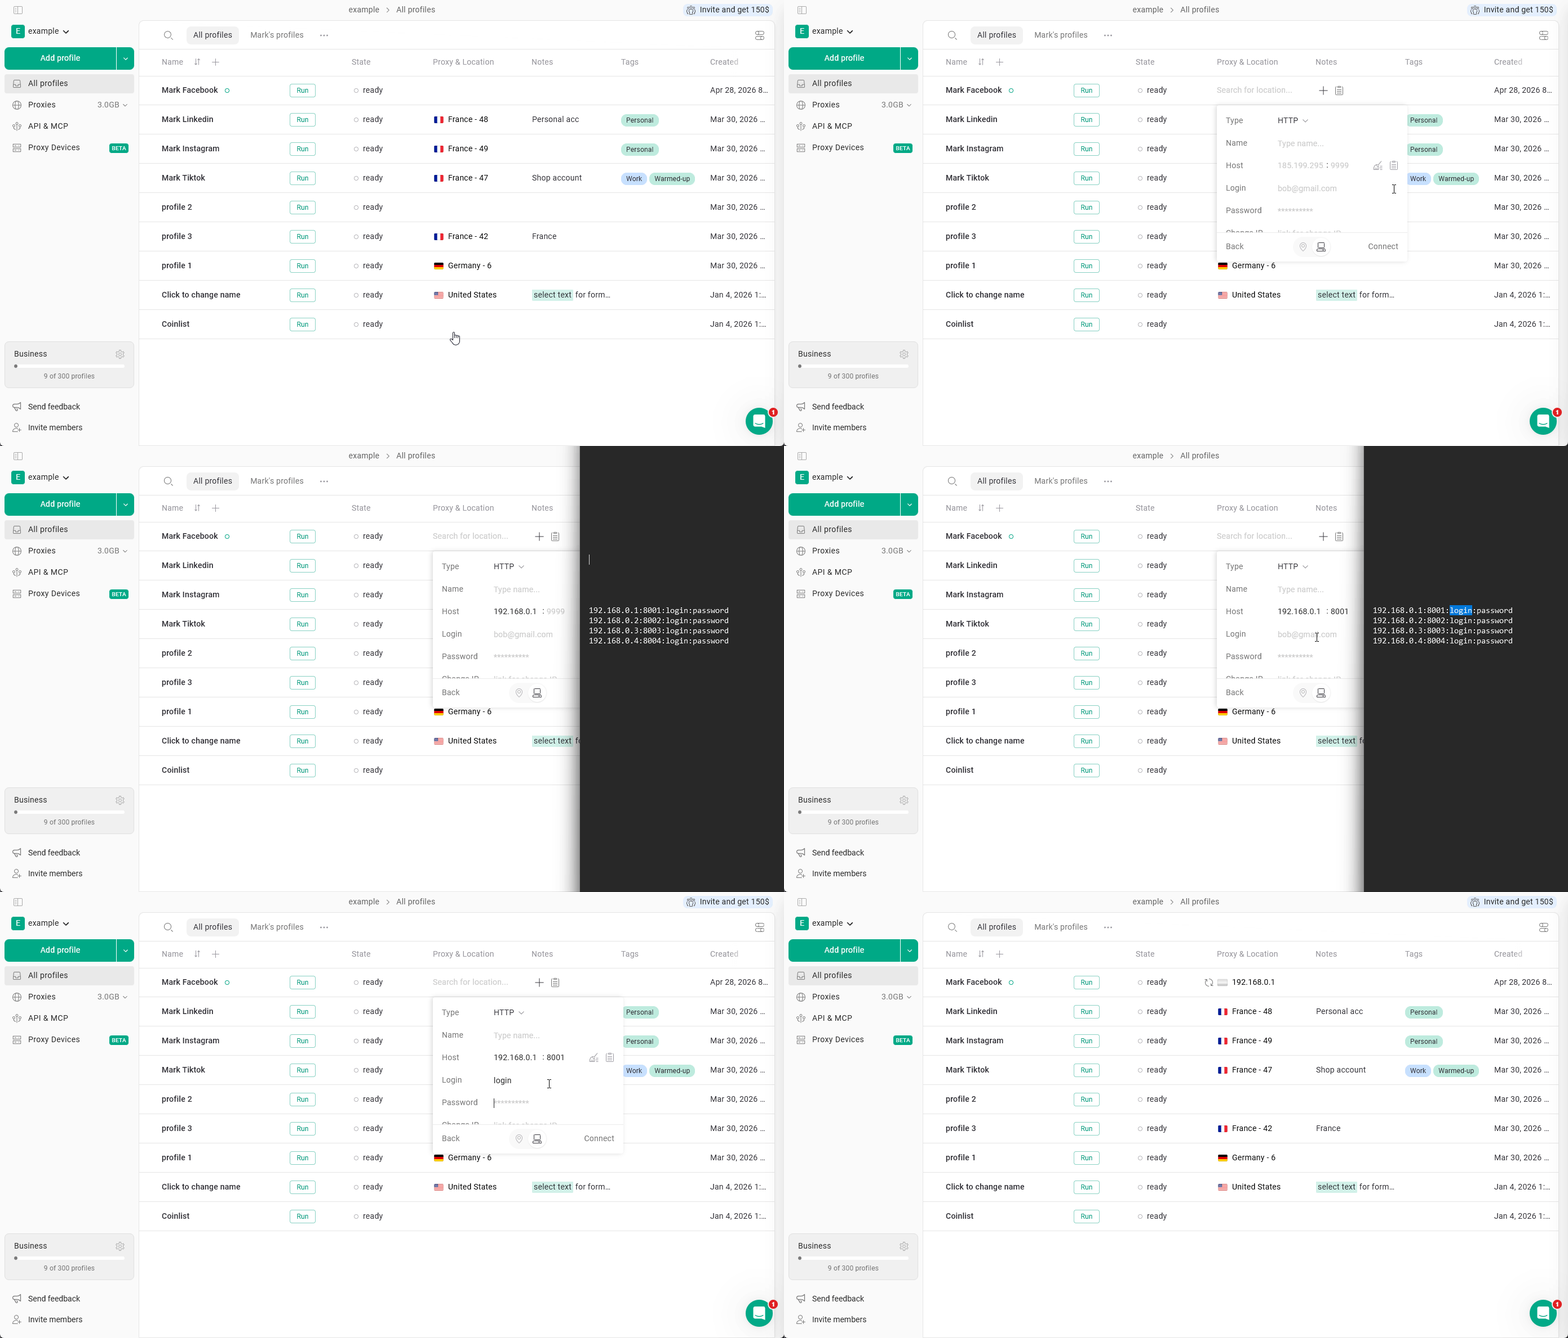
1. At the **All profiles** page, find the **Location** column and click the **+** button at the profile, which you want to add a proxy to.
2. In the opened window, hit the **computer icon** and input your **IP, port, username** and **password**.
* the HTTP or SOCKS protocol will get selected automatically based on availability, you can change it later.
3. Click **Connect**, the proxy is now added to your profile!
4. Gologin will check your proxy right away. You will see the green indicator if the proxy works properly, or the red one if it is not.
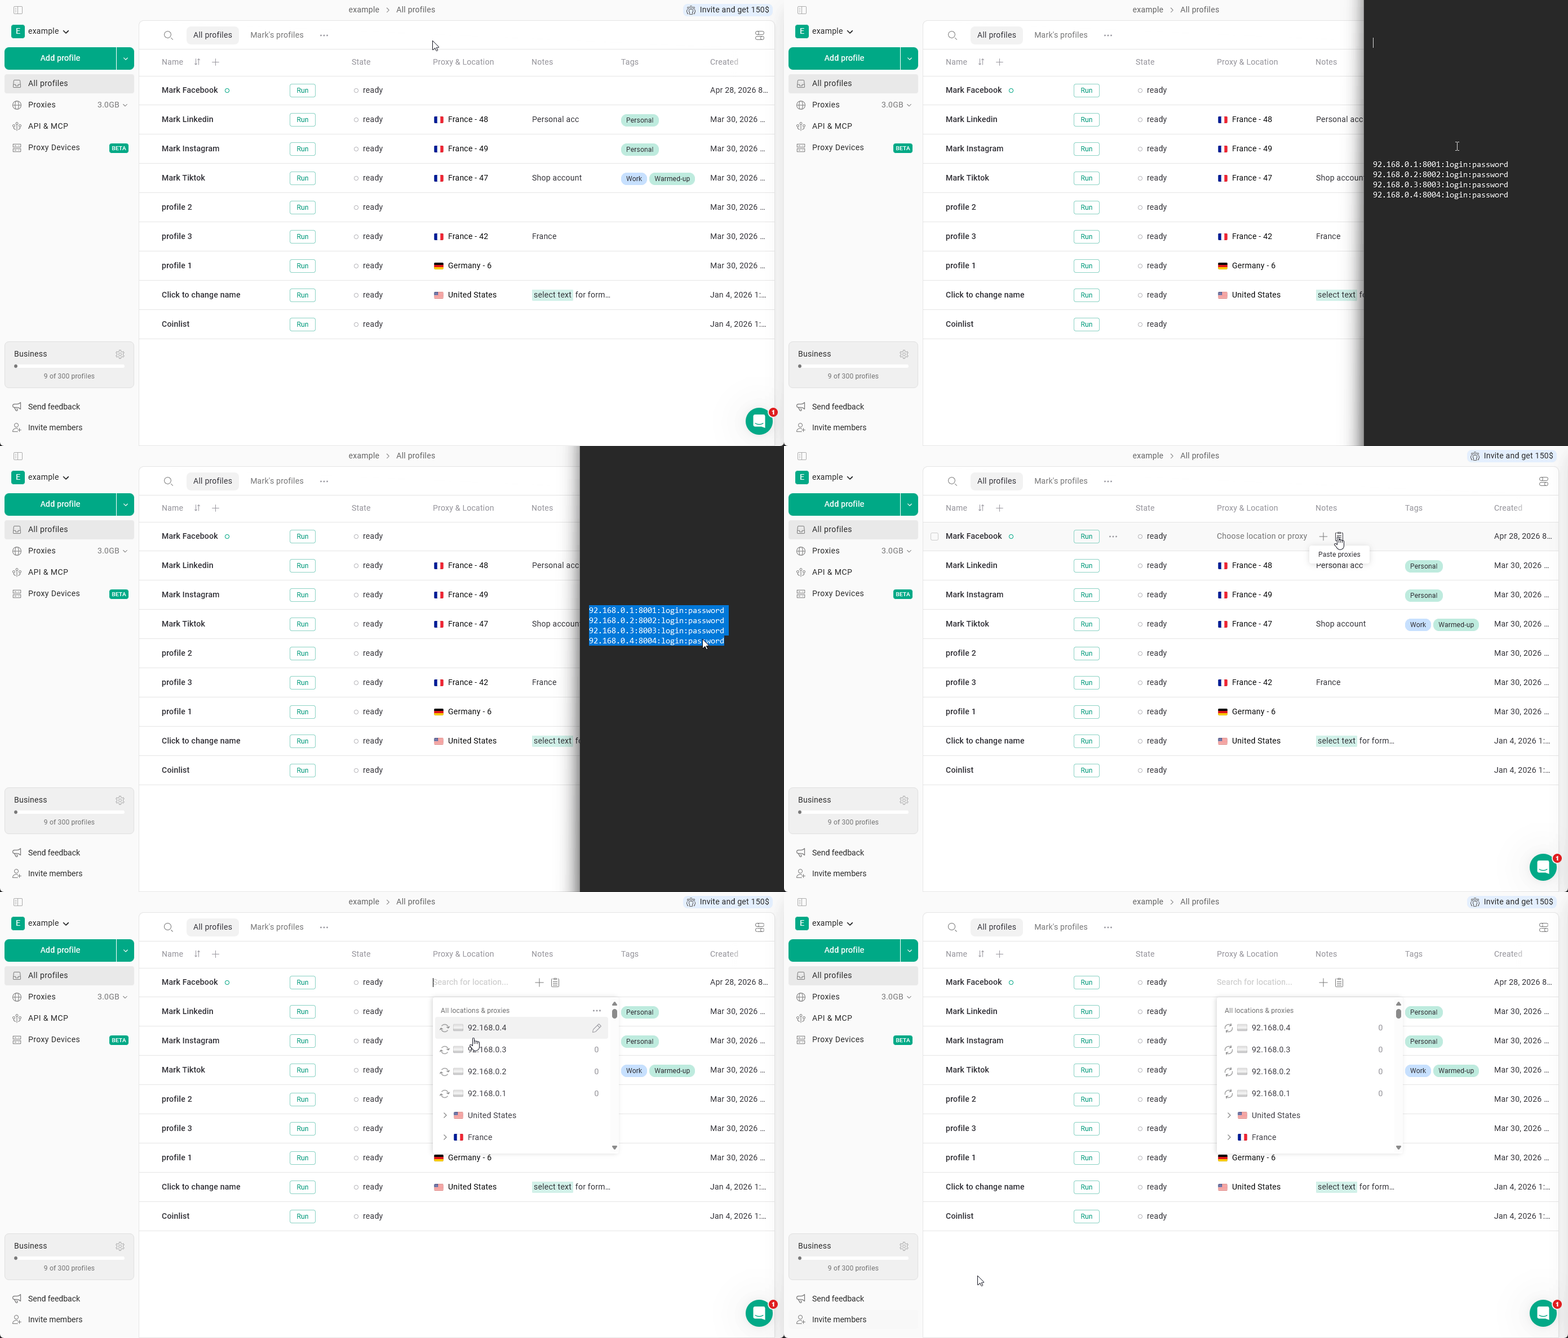
 You can paste proxies one by one or in bulk at the same page. Copy a few proxies and paste them all at once into the Location column. Use your system **hot keys** or the **Paste proxies** button. You will be able to rearrange your new proxies between the profiles later.
 ## Other ways of adding a single or multiple proxies
### On the Proxies page
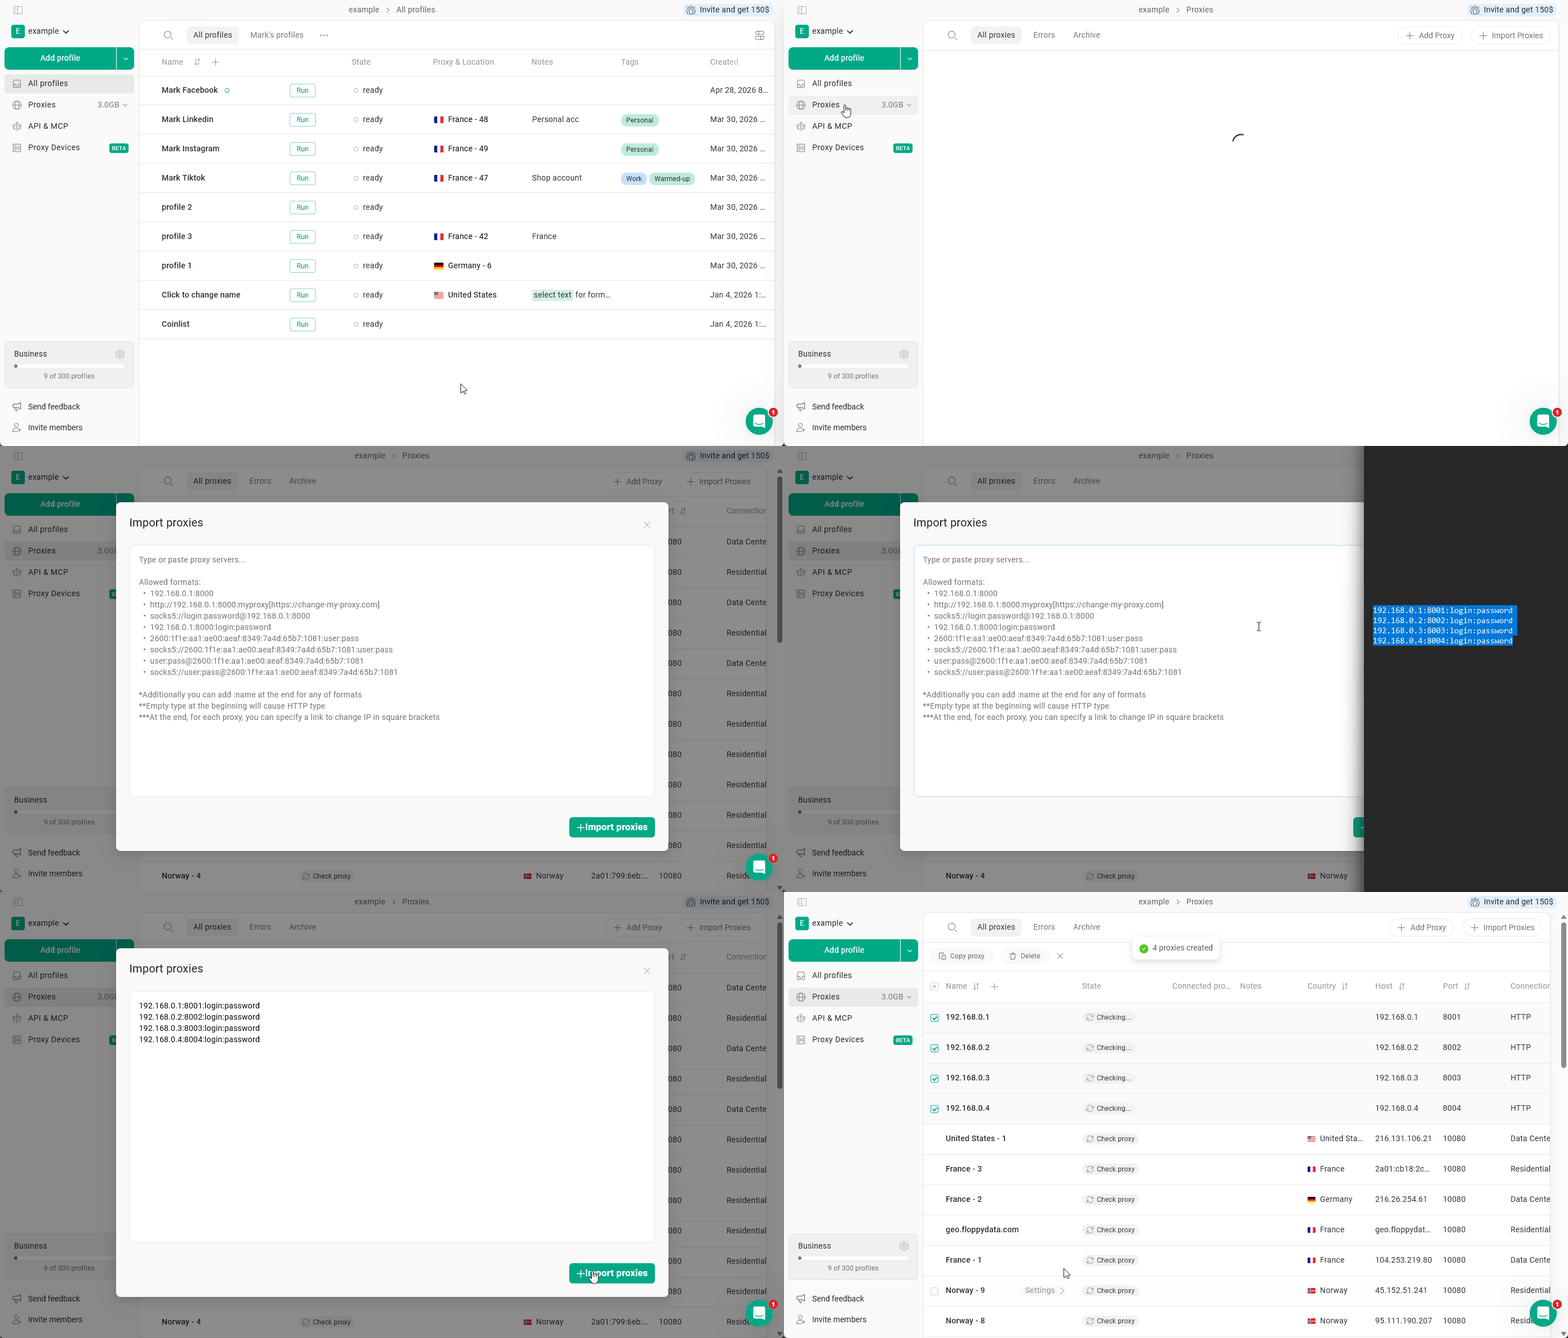
Navigate to the **Proxies** page in the left menu > **Import proxies** > Paste proxies and click **Import proxies**.
## Other ways of adding a single or multiple proxies
### On the Proxies page
Navigate to the **Proxies** page in the left menu > **Import proxies** > Paste proxies and click **Import proxies**.
 ### Using mass profile selection
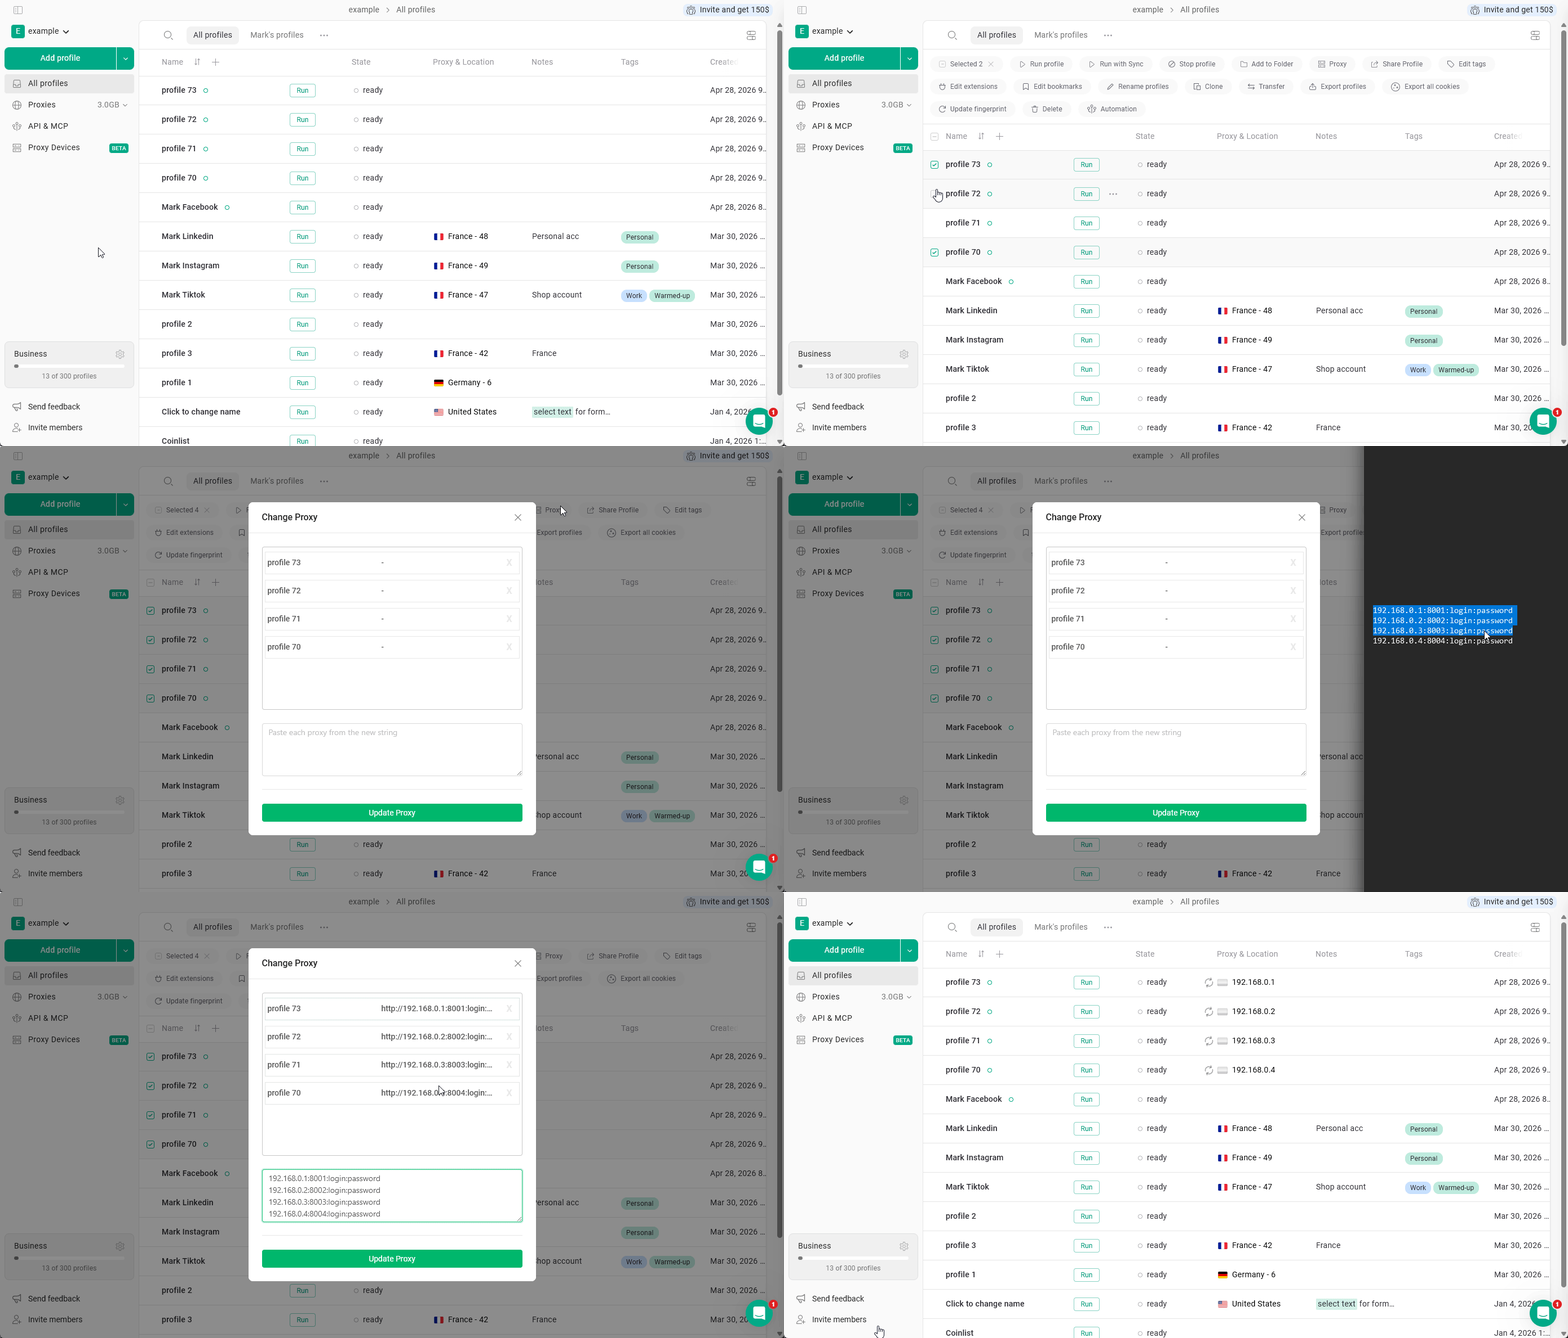
**Select a few browser profiles** > click **Proxy** in the bulk actions row > **input proxies** in a new window > click **Update proxy.**
### Using mass profile selection
**Select a few browser profiles** > click **Proxy** in the bulk actions row > **input proxies** in a new window > click **Update proxy.**
 ### In the profile settings
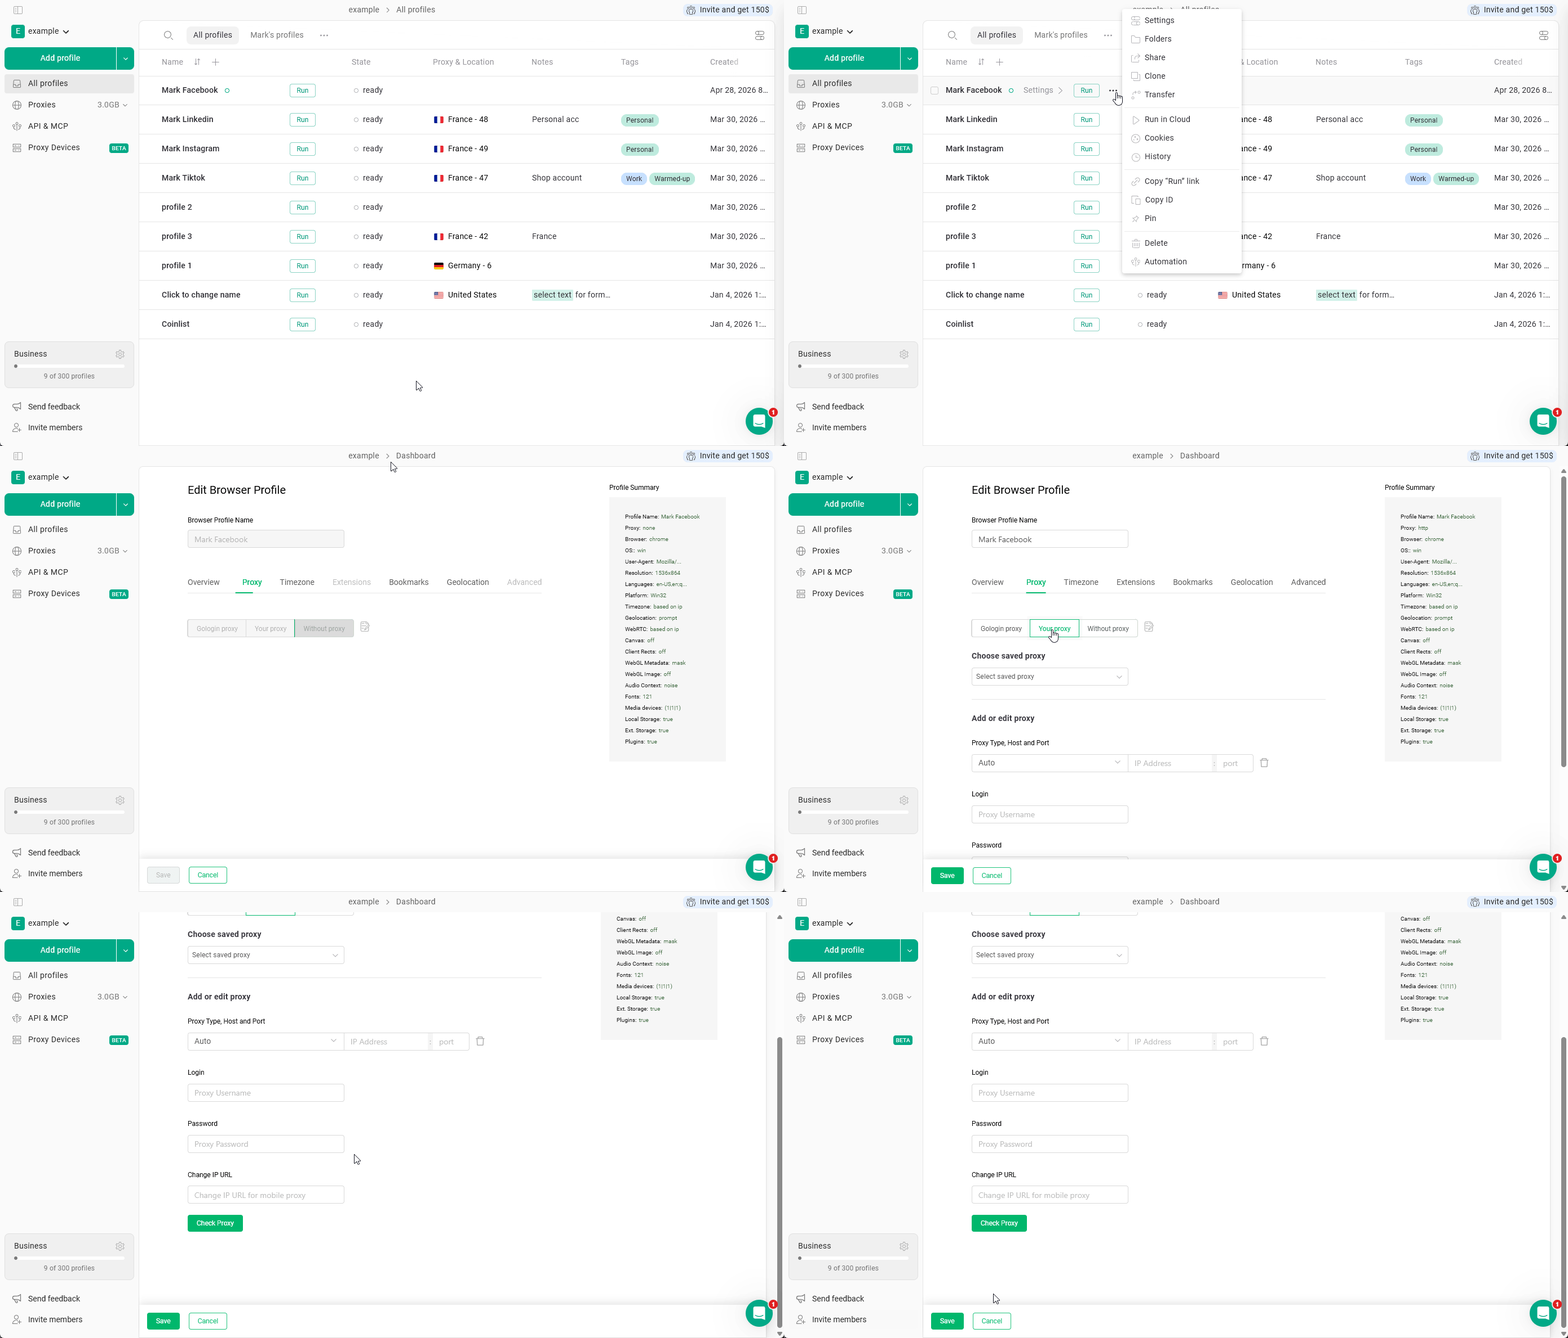
Click **3 dots on the profile** > **Settings** > **Proxy** > **Your proxy**
### In the profile settings
Click **3 dots on the profile** > **Settings** > **Proxy** > **Your proxy**